Getting Real on Gauge
We last wrote about gauge in the beginning of the year, since then we've seen a whole slew of gauge issues in our UX Knits, in our own projects, and we've heard lots about getting gauge from you online.
On the one hand, gauge is everything and it determines whether or not your whole project will work out. On the other hand, it doesn't have to be the end of the world if you find yourself unable to get the same gauge as a given pattern.
It's Bess writing this week, and I've got lots to say about gauge so let's go!

I knit the back of this tank twice, the first time it was nearly THREE inches too long.
Seriously, if the needles hadn't been sitting in the project the whole time I would have sworn I used the wrong ones.
First, a bit of a story
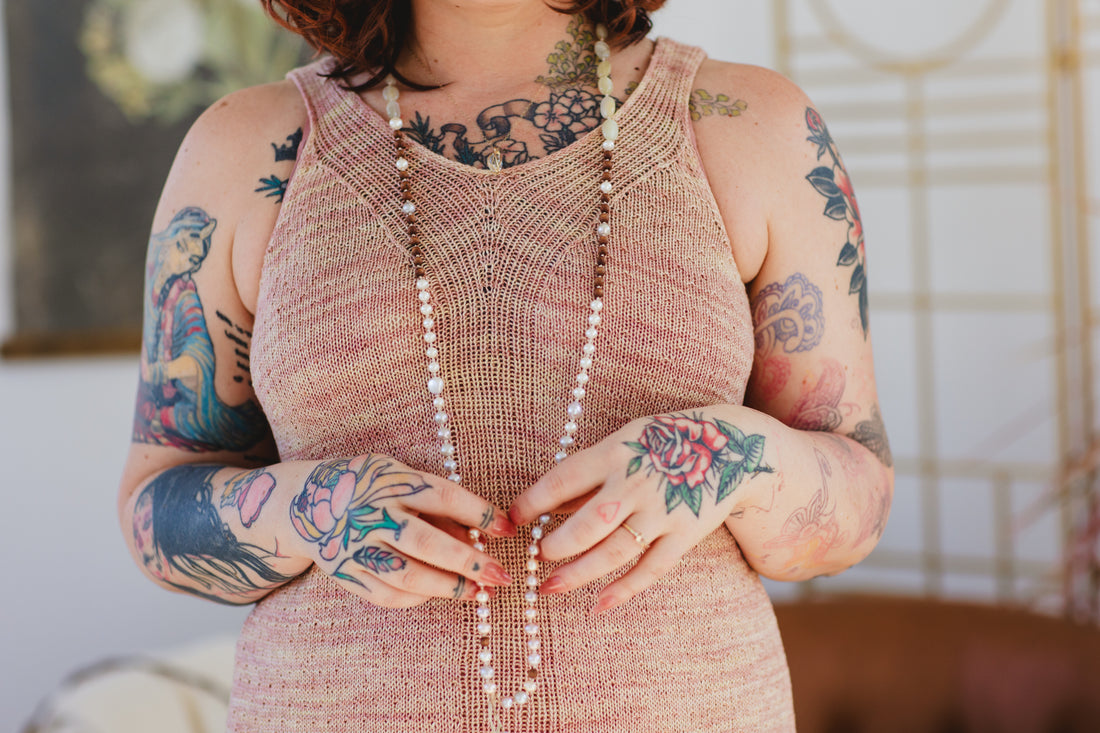
Betty's Mystique (the tank pictured above) is on its way into the world. This silk/linen blend tank pattern features both a long version and a short version.
I finished the long version ages ago, and started the short version soon after. Then, my fiancée was hospitalized, we got engaged, I released five patterns in three months, I traveled around to see Jen, lost a skein of yarn and then found a new one, and started planning my November wedding.
Y'all, it was A LOT.
Despite the fact that I never removed the needles from this project, when I picked it up a few weeks ago and knit the back, I ended up with about THREE EXTRA INCHES.
I tried it on and it looked like garbage, even after the i-cord had been applied. Only then did I realize the back was way off.
Why am I sharing all this? Because, since I became a designer and started running UX Knits, this experience is one of the most common that I see. Nothing is more of a bummer to a knitter than finally finishing a garment only to realize that it doesn't fit, at all. Especially when you've been excited to finally get the fit right (I feel like this every time I cast on!).
The bluntest truth is that a gauge change is enough to completely ruin the fit of a garment. Especially when there are a lot of precise fit details in the pattern.

See all that droop in the underarm? That's because the back is way too long and the weight of the extra fabric is even dragging the front straps back, exaggerating the problem and creating a less than ideal fit, to say the least.
So what exactly happened?
In my case I think it was all the stress and life changes that changed my gauge so dramatically. But, even without any drama, when we switch from working in the round to working flat, a lot of knitters will change gauge. This also happens when we go from large circumference in the round knitting to small circumference.
Even knitters with a lot of consistency in their gauge, like Jen and me, will still see this happen sometimes. We're humans, we are never going to have machine-like gauge consistency.
Are you saying all hope is lost?
Not at all, I'm just saying that if you don't pay attention to your gauge you are likely going to be disappointed from time to time (or even more often).
Then what do I do?
First, you make a real swatch so that you know your real gauge. When I say a "real" swatch I mean one that is:
- At least a six inch square (that's about 15 cm).
- Knit with the same exact needles you plan to use.
- Knit in the same way you'll be working. In the round garments almost always require some flat knitting as well, make sure you swatch both ways.
- Worked in the same yarn and same color that you will use. Yes, we've seen a gauge change when changing colors of the same yarn. This is most common with undyed vs. dyed skeins.
Now that you've got a real swatch knit, take your working gauge BEFORE blocking. Measure stitches and rows the same way you will after blocking, and make a note of that number where you keep your project notes.
Next, block your swatch. Block it the same way you'll block your finished garment. This depends on the yarn (you can check the ball band if you've got questions!), but in general, here are our tips:
- Soak the swatch until it is completely saturated.
- Gently squeeze out excess water.
- Lay your swatch flat to dry. Even if you will pin out your final garment, don't pin your swatch! (Exception, lace shawls or similar stitches that require being opened up.)
Now you've got your working gauge and your finished gauge. Does your gauge match the pattern? Yes, wow! Awesome! No? Read on.

This pattern features a textured knit purl stitch as well as 1 x 1 Rib. You'll need to make sure your gauge is accurate for both, but the all over textured stitch is the most important to match.
When you don't get gauge
I'm going to assume you checked different needle sizes and that you are happy with the fabric you've got, but your gauge does not match the pattern. How off is it? Even one stitch or row is going to impact the pattern, but it might not make much difference.
Gauge math
The first thing to check when you don't get gauge is the schematic. What's going to happen if you knit the pattern as is at your current gauge?
Take the pattern gauge and divide it by your working gauge. Let's say you've got 29 stitches instead of 28 stitches. 28/29 = 0.966
Let's say the neck width of this pattern in your size is 7.5".
7.5 x 0.966 = 7.245 (7.25 after rounding).
What you'll notice is that if you have EXTRA stitches and rows you will be making a SMALLER garment. If you have FEWER stitches and rows you will make a BIGGER garment.
In our example, a 7.25" neck width is probably okay for you, but the chest or hip circumference in this example is going to change by a larger amount. In this example we worked with widths, but the process is exactly the same to check the lengths using row gauge.
Post gauge math
Once you've checked the schematic it will become a lot clearer to you if the finished garment you'll make is going to work for you. If you've got questions about some of the measurements like your neck width or armhole depth, it can be really helpful to measure a garment that you are happy with and compare those numbers.
Now that you know what you're going to get, you can plan modifications or knit an entirely different size. Sometimes, sizing up or down will work very well with a gauge difference. Sometimes, you're going to have to do more work to make it work.
Don't forget, this is your project. If it feels like too much work, let it go. Life is too short to be unhappy in your knitting. If you're up for the challenge of modifying the pattern to work with your gauge, I bet you'll treasure that finished garment a little more than the ones that came easily.

Soft Walk (pictured on Jen above) features a special spreadsheet that does all the Gauge Math for you! Find it right here, make a copy, enter your gauge, and you'll see the schematic at your gauge. I used this tool to plan my own Soft Walk with some modifications at a very different gauge.
About that working gauge
Planning a successful project from the start is super important, but don't forget to keep track of your gauge! If you noted your working gauge before you blocked your swatch, it will be easy to check in and make sure you're still on track.
I recommend checking gauge when you reach big transitions like the bust darts, underarm shaping, or anytime you switch from working in the round to working flat, or vice versa, or when you change from large to small circumference knitting.
If you didn't note your working gauge (and I forget to do this all the time), you can still check your work! You will need to take your knitting off the needles, put it on scrap yarn, and block it. This takes a lot longer but it's a lot less time than ripping back and reknitting.
It's your knitting, you can cry if you want to
Listen, I'm going to admit that sometimes I throw all this caution out the window and just knit anyway. And I know you do, too. That's okay! And also, those are the times I often have to rip back and rework a section or a whole garment. Recently I've reknit two sleeves and a whole upper back because of gauge issues. I don't like it.
I understand the urge to just cast on and go, and I've accepted the consequences many times. Garments are not really cast on and go projects, not if you care about fit the way that we do. There are always shawls and blankets and projects that are much less affected by gauge if you truly don't want to go through the hassle.
Obviously, my opinion is that it is so worth all the hassle to end up with something you love. I'm putting this into practice more and more because I will rip and reknit until I get what I want, and that is such a waste of time.
We've got a couple more articles on gauge, as well as other topics, click through to explore.
Happy Knitting!